KNIT MAGAZINE
- Others
How to Repair Frayed Knitwear and Extend Its Life

- Post date:
- December 17, 2024 07:00
- (Update: November 22, 2024 22:49)
KNIT MAGAZINE

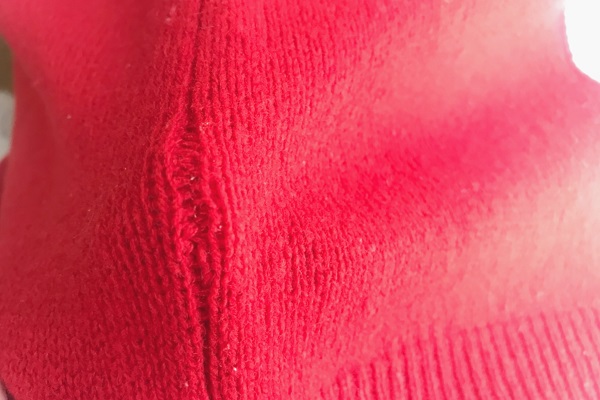

As warmer days increase and we rely less on winter knits, it’s the perfect time to repair any frayed sweaters before packing them away. While organizing my wardrobe, I noticed some spring knits with small issues I hadn’t seen before! If you’re in a similar situation, I’d like to share a simple and effective repair method.
Table of Contents

The other day, I pulled out a sweater I hadn’t worn in a while and discovered a hole in the underarm area. It turned out that the linking thread had snapped. This time, I’ll walk you through how to fix holes like this, which often appear along seams.
This method works for fraying or holes in these areas:
Whether the seams were originally linked or sewn with a regular or overlock sewing machine, this method is universally applicable.
This repair technique is called the U-shape joint because the stitches resemble the shape of the Japanese katakana character “コ” (ko).
First, prevent further unraveling. If the linking thread is sticking out, tuck it in carefully to stop it from coming loose. If you can’t tuck the thread back in, fold it down and secure it in place.
For this repair, you’ll use a separate thread, so there’s no need to leave the original thread exposed.

Thread the needle and insert it from the inside of the sweater. To ensure the knot doesn’t slip through the knit fabric, pick up a small section of the knit with the needle and secure the thread with a loop.
Bring the thread to the front side of the fabric and sew in a U-shape pattern, following the seam line. Insert the needle into the fabric, tracing the seam line loosely enough to pass through the knit without puckering it.
To create a clean finish, catch the edges of the original knit stitches as you sew.
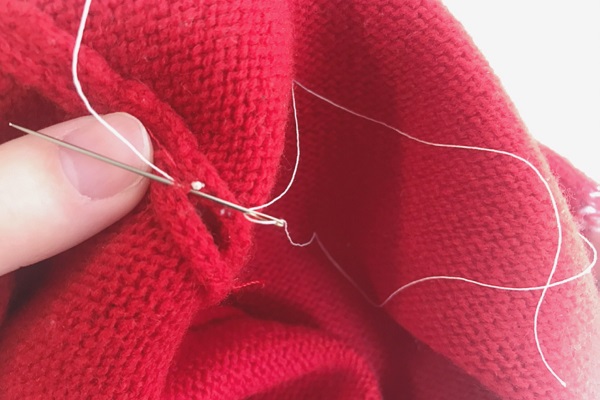
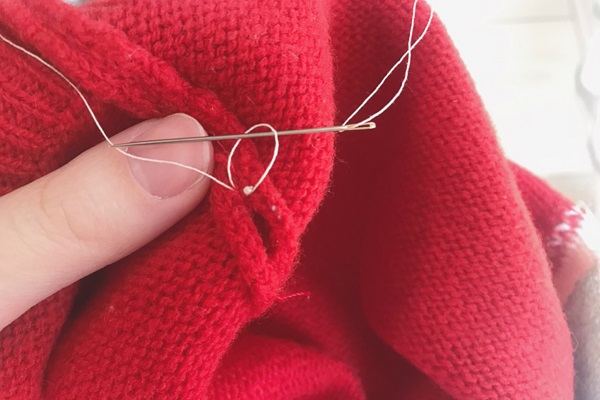

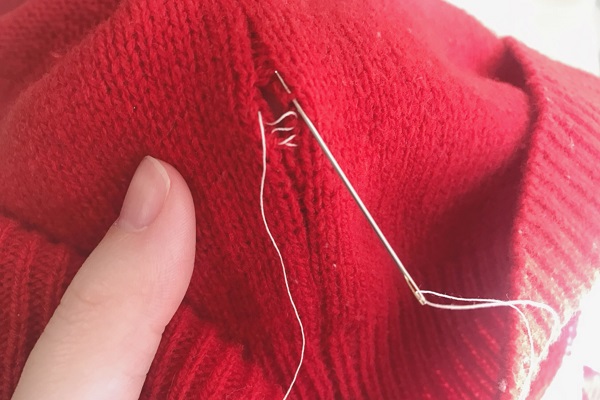
Once the hole is covered, pull the thread snugly to secure the stitches. Ensure the repair extends slightly beyond the damaged area to reinforce it.
Finally, tidy up the thread ends, and you’re done!
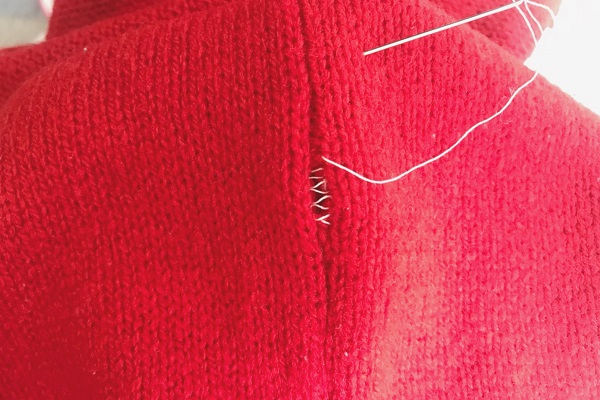
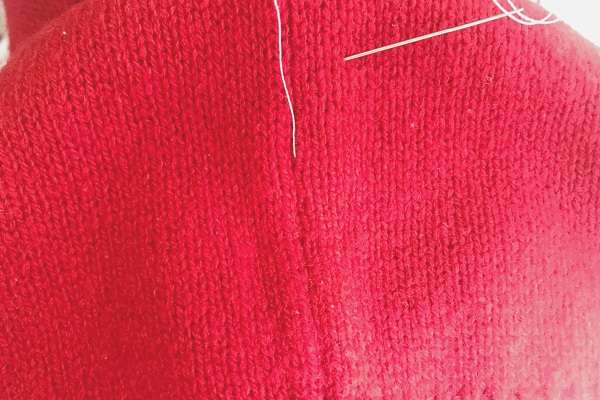

The repaired seam should now be strong and nearly invisible from the outside. While I used a contrasting thread for demonstration, using matching thread will make the repair blend even better.
With more time spent at home lately, it’s a great opportunity to tackle those repair tasks we often put off. By taking care of your favorite clothes, you’ll not only extend their lifespan but also enjoy wearing them even more when you head out.
Try this simple method to refresh your knits, and see you next time!
Subscribe Now
To receive the latest updates and insights, subscribe to our newsletter.
Contact Us
For further inquiries regarding this article, please feel free to contact us.